Is your car’s headlights starting to dim or have they completely gone out? Driving with faulty headlights is not only dangerous, but it’s also illegal. So, what do you do when this essential part of your car’s safety system fails?
You might be wondering, “Do I really need a mechanic for this, or can I replace the headlights myself?” The good news is that replacing your car’s headlights is a straightforward task that can be done at home with just a few tools and a little guidance. In this article, we’ll walk you through the process of how to replace your car’s headlights, offering tips and insights to ensure a smooth and safe replacement.
Let’s get started!
Why Headlight Maintenance Matters
Before diving into the step-by-step guide, let’s briefly discuss why maintaining your headlights is essential. Aside from allowing you to see the road in low-visibility conditions, headlights are also a critical safety feature for alerting other drivers of your presence. Ensuring they’re in good working order is a key aspect of overall car maintenance.
When Should You Replace Your Headlights?

Headlights don’t last forever. Here are some signs that it’s time to replace them:
- Dimming lights: If your headlights are not as bright as they used to be, it could mean the bulbs are wearing out.
- Flickering lights: If the lights flicker or cut out intermittently, it could be a sign of a failing bulb or electrical issue.
- Completely burned-out: This is the most obvious sign; if one or both of your headlights are out, they need to be replaced.
By acting early, you can prevent accidents and avoid fines for driving without fully functioning lights.
Tools You’ll Need to Replace Headlights
Replacing your car’s headlights can be a DIY task, but it requires some basic tools. Here’s a list of what you’ll need:
- New headlight bulbs (make sure they’re compatible with your car model)
- Gloves (to prevent oils from your skin getting on the bulb)
- Flathead screwdriver
- Phillips head screwdriver
- A towel or cloth (to protect the car’s surfaces)
- Owner’s manual (to check the specific steps for your car model)
Step-by-Step Guide: How to Replace Your Car’s Headlights

Replacing headlights may vary depending on the car make and model, but the basic steps remain the same. Follow this step-by-step guide to replace your headlights safely and correctly.
1. Turn Off the Car and Open the Hood
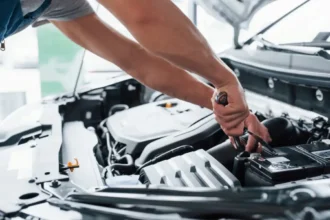
Before starting any car maintenance, always ensure the engine is off, and the car is parked on a flat surface. Pop the hood and secure it with the hood prop rod.
2. Locate the Headlight Bulb
Depending on your car model, the headlight bulb will either be accessed from the engine compartment or behind the headlight housing. Most cars have the headlight compartment directly behind the headlight assembly.
3. Disconnect the Power Connector
Once you’ve located the headlight bulb, you’ll notice a power connector attached to the back of it. Carefully unplug the power connector by pressing the release tab and pulling the connector away from the bulb.
4. Remove the Old Bulb
Some bulbs are held in place by a clip or a cap. Use a flathead screwdriver if necessary to pry off the cover gently. Turn the bulb counterclockwise and carefully pull it out from the socket. Be cautious not to touch any parts of the bulb that might be hot.
5. Install the New Bulb
Now, it’s time to install the new bulb. Handle it with gloves to prevent oils from your fingers transferring to the bulb. Align the new bulb with the socket and insert it, turning it clockwise to secure it in place.
6. Reconnect the Power Connector
After securing the new bulb, reconnect the power connector by pushing it back into place until you hear a click.
7. Test the New Headlights
Before closing the hood, turn on your car and check that the new headlights are working properly. If they’re not, double-check the connection or bulb alignment.
8. Close the Hood
Once the new headlights are tested and working, close the hood securely.
Common Mistakes to Avoid When Replacing Headlights
Even though replacing headlights is a simple task, there are a few common mistakes to avoid:
- Touching the bulb: Oils from your fingers can cause the bulb to overheat and burn out prematurely.
- Forgetting to check the bulb type: Not all headlights are the same. Double-check your car’s manual or ask a store associate to ensure you have the right type.
- Improper alignment: Misaligned headlights can reduce visibility or blind oncoming drivers. Make sure the bulbs are securely in place.
Table: Estimated Lifespan of Different Headlight Bulbs
| Type of Headlight Bulb | Average Lifespan | Brightness (Lumens) |
|---|---|---|
| Halogen | 500-1,000 hours | 700-1,200 lumens |
| LED | 30,000-50,000 hours | 3,000-4,000 lumens |
| HID (Xenon) | 2,000-3,000 hours | 3,500-4,000 lumens |
As you can see, LED headlights have the longest lifespan, but they tend to be more expensive than halogen bulbs. However, investing in longer-lasting bulbs can save you time and money in the long run.
FAQs About Replacing Car Headlights
Q1: Can I replace my car’s headlights with LED bulbs? A: Yes, many cars are compatible with LED headlights, but you should check your car’s manual for bulb compatibility. LED bulbs are more energy-efficient and last longer than halogen.
Q2: Do I need to replace both headlights at the same time? A: While it’s not necessary to replace both headlights at once, it’s often recommended. If one headlight goes out, the other may not be far behind, and replacing them together ensures consistent brightness.
Q3: How often should I check my headlights? A: It’s a good practice to check your headlights every time you perform routine car maintenance, such as oil changes or tire rotations. This ensures you catch any issues before they become hazardous.
Q4: What if my new headlights are still dim? A: If your new headlights appear dim, it could be due to an electrical issue, corrosion in the headlight assembly, or improper installation. Double-check the connections or consult a mechanic.
Tips for Maintaining Your Car’s Headlights
Replacing your car’s headlights is important, but maintaining them can extend their lifespan and keep you safe on the road. Here are a few tips:
- Keep headlights clean: Dirt and grime can accumulate on your headlights, reducing their brightness. Regularly clean the lenses with soap and water.
- Inspect for cracks: Cracks or moisture in the headlight housing can lead to damage or bulb failure. Repair or replace any damaged components as needed.
- Use headlight restoration kits: Over time, headlights can become foggy or yellowed due to sun exposure. Restoration kits can help clear the lens, improving light output.
Conclusion
Replacing your car’s headlights doesn’t have to be a daunting task. With the right tools, knowledge, and a little patience, you can tackle this aspect of car maintenance yourself, saving both time and money. Always remember to check your headlights regularly and replace them as soon as you notice signs of wear. By following this guide, you’ll have your headlights shining brightly in no time, ensuring a safer driving experience for you and others on the road.
So, are you ready to replace those headlights? Let’s get those tools out and light the way!


